In this
series of posts, I am writing about various AWS services. In my previous posts,
I have written about AWS EC2, ELB, Auto Scaling and DynamoDB.
As I
said in my
last post, this post will be about adding a user activation functionality
to our digital card store application.
In that
post, I have added User and Card DynamoDB tables to hold user and card
information. When a new user is registered, the user was able to use the
application immediately.
For
this post, I will add an additional step to user registration process to make
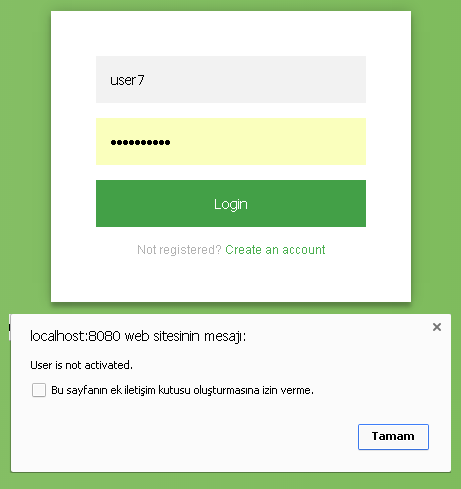
sure that no fake user is registered in our application. Before activation users
will not be allowed to log in.
The User Activation Process
To make
the mail sending process is independent from user registration request, I will
use a message queue. Amazon Simple Queue
Service is used to send and receive messages.
We can use Amazon Simple Email Service
to send and receive email messages.
Activation
process is shown below. When the user is registered, user information is
persisted into DynamoDB and an activation message is put into the user
activation queue. The application receives the message from the queue and sends
the activation mail to the user.

When
the user received the message, clicks the activation link in the message.
Application process the activation request and marks the user as active in
DynamoDB as shown below.

Steps
1. Prepare the queue in SQS
2. Verify the sender email address in SES
3. Change the application.
4. Start EC2 instances with SQS and SES
permissions
Let's
start.
1. Prepare the queue in SQS
Before
sending messages to the queue, we should create the queue. Using the command
below, we can create the queue with AWS CLI.
aws sqs create-queue --queue-name
MailsToSendForUserActivation --attributes VisibilityTimeout=600
{
"QueueUrl": "https://eu-central-1.queue.amazonaws.com/XXXX/MailsToSendForUserActivation"
}
Now we are ready to use the queue.
2. Verify the sender email address in SES
Before using Amazon Simple Email
Service, you should verify your sender email address. You can verify
your email address using the steps below.
- Sign in to
the AWS Console. Under AWS Services choose SES.
- Select Email
Addresses from the navigation pane and
then click Verify a New Email Address.
- Enter your email address and
click Verify This Email Address.
Amazon
Simple Email Service will send a verification email to the address. The verification
link will be active 24 hours. When you click the verification link, the email
address is verified.
New AWS users are allowed to use
Simple Email Service in a limited environment for security reasons. This
limited environment is called SES Sandbox. In SES Sandbox,
you can only send email to the verified email addresses. To use Simple Email Service for
production, you should open
a ticket to AWS Support.
After the verification is done,
you can send email to the verified email addresses.
3. Change the application
To show how to use SQS and SES, I will use the digital
card store application that I have used in my
previous post. The code can be found at my GitHub repository.
To use SQS and SES, we should change our applicaton as
shown below.
a. Add dependencies
Amazon SQS Java
Messaging Library is a Java JMS implementation for accessing Amazon SQS. We
will use this library with Spring JMS. Also we will use aws-java-sdk-ses
library to access Amazon SES.
<dependency>
<groupId>org.springframework</groupId>
<artifactId>spring-jms</artifactId>
</dependency>
<dependency>
<groupId>com.amazonaws</groupId>
<artifactId>aws-java-sdk</artifactId>
<version>1.9.6</version>
</dependency>
<dependency>
<groupId>com.amazonaws</groupId>
<artifactId>amazon-sqs-java-messaging-lib</artifactId>
<version>1.0.0</version>
<type>jar</type>
</dependency>
<dependency>
<groupId>com.amazonaws</groupId>
<artifactId>aws-java-sdk-ses</artifactId>
<version>1.9.6</version>
</dependency>
b. Configure SQS
We configure Spring JMS to use SQSConnectionFactory as
shown below. You can change your region accordingly.
@Configuration
@EnableJms
public class SQSConfig {
SQSConnectionFactory connectionFactory = SQSConnectionFactory.builder()
.withRegion(Region.getRegion(Regions.EU_CENTRAL_1))
.withAWSCredentialsProvider(new
DefaultAWSCredentialsProviderChain()).build();
@Bean
public DefaultJmsListenerContainerFactory jmsListenerContainerFactory() {
DefaultJmsListenerContainerFactory factory = new DefaultJmsListenerContainerFactory();
factory.setConnectionFactory(this.connectionFactory);
factory.setDestinationResolver(new DynamicDestinationResolver());
factory.setConcurrency("3-10");
factory.setSessionAcknowledgeMode(Session.CLIENT_ACKNOWLEDGE);
return factory;
}
@Bean
public JmsTemplate defaultJmsTemplate() {
return new JmsTemplate(this.connectionFactory);
}
}
After configuration is done, we can create a simple
service to send messages to the queue.
@Service
public class SQSService {
@Autowired
protected JmsTemplate defaultJmsTemplate;
public void sendMessage(String queueName, String messageBody) {
defaultJmsTemplate.convertAndSend(queueName, messageBody);
}
}
b. Configure SES
We configure SES as
shown below. You can change your region accordingly. Please note that SES is
not available in every region, so you might use a different region than you
used with other services.
@Configuration
public class SESConfig {
@Value("${mail.from.address}")
String mailFromAddress;
@Bean
public AmazonSimpleEmailService amazonSimpleEmailService() {
AmazonSimpleEmailService client = new AmazonSimpleEmailServiceClient();
client.setRegion(Region.getRegion(Regions.EU_WEST_1));
return client;
}
public String getFromAddress() {
return mailFromAddress;
}
}
After configuration we can create a simple service to
send email.
@Service
public class SESService {
@Autowired
SESConfig sesConfig;
public void sendMessage(String to, String subject, String body) {
Destination destination = new Destination().withToAddresses(to);
Content subj = new Content().withData(subject);
Content bdy = new Content().withData(body);
Message message = new Message().withSubject(subj).withBody(new Body().withHtml(bdy));
SendEmailRequest request = new SendEmailRequest().withSource(sesConfig.getFromAddress())
.withDestination(destination).withMessage(message);
sesConfig.amazonSimpleEmailService().sendEmail(request);
}
}
c. Change User class
We add activationStatus and activationToken fields
to User class as shown below.
@DynamoDBTable(tableName = "User")
public class User {
public static final String ACTIVATION_STATUS_NONE = "NONE";
public static final
String ACTIVATION_STATUS_MAIL_SENT = "MAIL_SENT";
public static final
String ACTIVATION_STATUS_DONE = "DONE";
@DynamoDBHashKey
private String username;
private String name;
private String password;
private String email;
private double balance;
private String activationStatus = ACTIVATION_STATUS_NONE;
private String activationToken;
c. Change UserController class
We add userActivationQueueName, sqsService and sesService fields as shown below.
@Controller
public class UserController {
public static final String USER_KEY_FOR_SESSION = "USER";
@Autowired
UserRepository userRepository;
@Value("${user.activation.queue.name}")
String userActivationQueueName;
@Autowired
SQSService sqsService;
@Autowired
SESService sesService;
We change registerUser to call prepareForActivation as
shown below.
@RequestMapping(value = "/users", method = RequestMethod.POST)
@ResponseBody
public boolean registerUser(@RequestBody User user, HttpServletRequest request) {
User previous = userRepository.findOne(user.getUsername());
if (previous == null) {
prepareForActivation(user, makeActivationUrlFromRequest(request, "/users"));
user.setBalance(100);
userRepository.save(user);
}
return previous == null;
}
We add prepareForActivation to generate a user activation token and send activation
message to the queue as shown below.
private String
makeActivationUrlFromRequest(HttpServletRequest request, String suffixToReplace) {
return request.getRequestURL().toString().replace(suffixToReplace, "/activate");
}
private void prepareForActivation(User user, String url) {
user.setActivationToken(String.valueOf(100000 * Math.random()));
sqsService.sendMessage(userActivationQueueName,
"{\"username\": \"" + user.getUsername() + "\",
\"activationUrl\":\"" + url + "\"}");
}
We add handleUserActivationMailMessage to listen
queue messages and send activation emails as shown below.
@JmsListener(destination = "${user.activation.queue.name}")
public void handleUserActivationMailMessage(String json) {
try {
ObjectMapper mapper = new ObjectMapper();
Map<String, String>
data = mapper.readValue(json, Map.class);
String username = data.get("username");
String activationUrl = data.get("activationUrl");
User existing = userRepository.findOne(username);
if (existing != null && !existing.getActivationStatus().equals(User.ACTIVATION_STATUS_DONE)) {
System.out.println("Sending
activation mail for user " + username);
sendActivationMailForUser(existing, activationUrl);
existing.setActivationStatus(User.ACTIVATION_STATUS_MAIL_SENT);
userRepository.save(existing);
}
} catch (Exception ex) {
throw new RuntimeException("Encountered error while processing
user activation message.", ex);
}
}
private void sendActivationMailForUser(User user, String activationUrlBase) {
String activationUrl = activationUrlBase + "?username=" + user.getUsername() + "&token="
+ user.getActivationToken();
String to = user.getEmail();
String subject = "Activate your
Digital Card Store account";
String body = "<html><body><br/>" + "Dear " + user.getName() + "<br/>" + "<a href=\"" + activationUrl
+ "\">Please click to activate
your user account " + user.getUsername() + "</a><br/>"
+ "</body></html>";
sesService.sendMessage(to, subject, body);
}
We add activateUser as shown below. This method will be called when a user is
clicked the activation link in the activation email.
@RequestMapping("/activate")
public String activateUser(Map<String,
Object> model, @RequestParam("username") String username,
@RequestParam("token") String token) {
User user = userRepository.findOne(username);
if (user == null)
model.put("result", "User not found: " + username);
else if (user.getActivationStatus().equals(User.ACTIVATION_STATUS_DONE))
model.put("result", "User " + username + " already activated.");
else if (!user.getActivationToken().equals(token))
model.put("result", "Activation token for user " + username + " is not
correct.");
else {
user.setActivationStatus(User.ACTIVATION_STATUS_DONE);
userRepository.save(user);
model.put("result", "User " + username + " activated successfully.");
}
return "activationResult";
}
4. Start EC2 instances with SQS and SES permissions
When
we deploy our application to the EC2, we should start EC2 instances with an IAM
role that have AmazonSQSFullAccess
and AmazonSESFullAccess
permissions.
Also
we should give mail.from.address and user.activation.queue.name parameters accordingly. We can use EC2 instance tags and init
scripts to set these parameters.
After
we deploy our application, the activation process will be enabled. After an
user is registered, registration emails are sent to the user. Users will be
allowed to login only after activation. Activation can be done by clicking
activation link in the mail. You can use the application like the screenshots
below.


Summary
In this post, I have added
user activation process to prevent fake users. I have used Amazon SQS queues to
send and receive messages. To send emails Amazon SES is used. The code can be
found at my GitHub
repository.
In my next posts, I
will continue to use various AWS services to add functionality to my digital
card store application.
Needed to compose you a very little word to thank you yet again regarding the nice suggestions you’ve contributed here.
ReplyDeleteAWS Training in Bangalore|
This comment has been removed by the author.
ReplyDeleteEmail Marketing is a great way of promoting your business.
ReplyDeleteemail verification service
This article are supper help full if you want to now more aboutsolepaycard.com activatethen please click here:
ReplyDeleteNice Article, Thank you for sharing a wonderful blog post.
ReplyDeleteDevOps Training
DevOps Online Training
solepaycard.com activate
ReplyDeleteSome may stag in Interviews!!! OOPS!! More than 50% of students do this in their career. Instead, do Hadoop Training in Chennai at Infycle. Those students can easily clear this Interview session because more than 5 times at INFYCLE practicing mock-interview sessions, Hence students are Getting out of their interview fear.
ReplyDeleteShine bright with the Junior Jewels Shirt a bold blend of style and attitude that turns every outfit into a statement. With its standout design, vibrant details, and unmatched comfort, this shirt isn’t just worn, it’s flaunted. Perfect for trendsetters who dare to be different, it’s the ultimate way to elevate your everyday look with effortless flair.
ReplyDeleteNeed an Amazon SES alternative? Compare email platforms with superior deliverability, easy integration, dedicated support, and advanced email APIs for startups, marketers, and enterprises.
ReplyDelete