In this post, I will show how to use AWS Elastic Load Balancing (ELB) and AWS Auto Scaling Groups (ASG) to provide load balancing and zero downtime update
for our digital card store.

In my last post, I have written about running a digital card store prototype on Amazon Web
Services (AWS). The application was built
with Java Spring Boot framework. In the post, I have created one EC2 instance
to run the application by using S3 and EC2 services.
For a prototype, runnning the application in one EC2
instance may be sufficient to show how it works. However, in a real world
scenario, we should consider the disadvantages of running only one instance.
Disadvantages of Running One Instance
First
let's review the mechanism:
1. We run one EC2 instance
2. We use the public ip address of the instance to access
Now,
let's think about the disadvantages of this mechanism.
What
if the instance is stopped by accident. Our application will not be available.
Until we start the same instance or an another instance, users can not use the
application.
Also
we may stop the instance to update the application. During the update process,
the application won't be servicing the requests.
We
should consider another condition. If our application usage increases, one
instance will not be sufficient to process all the requests efficiently.
Requests will start to be delayed after some level and finally the application
won't accept new connections anymore.
Considering the second point, the use of the public ip
address (or the public host name) of the instance will be a problem when we
launch another instance. The address of the new instance will be different. In
this case we should notify our users about the address change. Again this is
not a suitable solution for production usage.
Advantages of Running Multiple Instances
To address all these problems we should run multiple
instances of the application. The mechanism is described below:
1. We run multiple EC2
instances
2. We use a load
balancer to distribute the requests to the instances
3. We use the
address of the load balancer to access the application
In this way:
1. The load is
distributed to the instances, so each instance process only a part of the load.
2. The application
will be available when one instance is shut down by accident or for update
purposes.
3. Users are not
affected by instance address changes because they are using the load balancer
address, not the address of a specific instance.
Elastic Load Balancing and Auto Scaling Groups on AWS
In AWS, we use Elastic Load Balancing (ELB) service as
load balancer. When we create an ELB, a public domain name is generated for the
ELB. We use this ELB address to access to the application behind the ELB.
AWS provides auto scaling by Auto Scaling Groups
(ASG). ASG enables us to dynamically scale your EC2 instances out or scale in according to some condition. For example, if cpu usage is over 90% for 5
minutes ASG can scale out by launching a new instance, and scale in by
terminating one instance if cpu usage is below 10% for 10 minutes. AWS ASG
enables us to define this conditions by AWS console or AWS CLI tools.
In addition to dynamic scaling, ASG provides manual
scaling. This is useful for the situations that are specific to your account.
For example, if your application is known to get less traffic from 6PM to
9AM and at weekends, you can make significant cost savings by reducing the
instances with a script.
Providing Load Balancing And Zero Downtime Update
For this post, I will create an ELB and an ASG to provide
load balancing and availability during the update process. This way we can
update our application with zero downtime. Please note that while we can get
this functionality with AWS CodeDeploy,
I especially use AWS Java SDK to access AWS ELB, ASG and EC2 services in
this post.
I will use manual scaling feature of ASG to launch additional
instances with the new application version and to close the old instances with the
old application version. The process is below:
1. Change the
application
2. Build the
application
3. Upload the application
to the S3 bucket
4. Create a new
instance in ASG to get updated application
5. Close the
instances that run the old application
Every ASG has min, max and desired instance count. For
this post, I will create an ASG with min instance count and desired instance
count is set to 2. Max instance count will be 4. With this settings, our
application will run with 2 instance in normal time. Because the min instance
count is set to 2, if one instance is terminated accidentally, ASG will launch
a new instance and keep instance count at 2 and we will be sure that enough
instance is running every time. Also ELB will provide load balancing by
distributing the requests to instances in a round-robin fashion.
By setting the max instance to 4, we leave a room for update
processes. During the application process, we will launch two new instance with
the new version and instance count will increase to 4. This way our application
will be available during the entire update process. After the update, instance
count will decrease to 2 again.
The steps for the entire update process are below:
1. Application is running 2 instances before the update.

2. We launch 2 new instances by setting desired instance
count to 4.
The instance
count will increase to 4 and new instances will get the new application.

3. We wait for ELB
to register new instances.
This is to make sure that before destroying old
instances, ELB can use the new instances. The new instances is not registered
very quickly. ELB does a few health checks to ensure they are started to
serving requests.
4. Deregister old
instances from ELB.
Before terminating old instances we should remove the old
instances from ELB. Otherwise, ELB will try to use this instances and a few requests
can get errors before unhealthy threshold ends.
5. We set the
desired instance count to 2 again to close the oldest instances.
While creating our ASG we specify termination policy as
OldestIntance especially to ensure the new instances are not terminated during
scaling in.
6. Now we have 2
instances that run the new application.

To follow and understand the process easily, I have built
a Java Spring Boot application that show the application version and public ip
address of the instance that process the request. Using the application we will
see the ELB is dispatching the requests to different instances and we will
notice the application versions. You can clone the application here.
Prerequisites
1.
An AWS account
2. AWS CLI Tools
5.
Key pair, Security Group, IAM instance role and S3 bucket.
In
my first post, I showed how to register and
install AWS CLI Tools. I will
use the key pair, security group, IAM instance role and S3 bucket that I have
created in my previous post.
The steps to deploy and update the application are shown
below.
1. Prepare
the application
2. Create
the ELB
3. Create
Launch Configuration
4. Create
the ASG to launch the application and see load balancing works
5. Change
the application
6. Do
zero downtime update
Let's
start.
1. Prepare the application
Execute the git clone command to clone the
application.
$ git clone https://github.com/ceyhunozgun/cardstore2
Package the
application using the commands below.
$ cd cardstore2
$ mvn package
Maven will create the
WAR file in the target directory.
$ ls target/*.war
target/cardstore-0.0.1-SNAPSHOT.war
To
put the WAR to the S3 bucket, execute the following command. Replace cardstoredeploy with your S3 bucket name.
$ aws s3 cp target/cardstore-0.0.1-SNAPSHOT.war
s3://cardstoredeploy/
upload: target\cardstore-0.0.1-SNAPSHOT.war to s3://cardstoredeploy/cardstore-0.0.1-SNAPSHOT.war
Now you should see
the WAR in AWS S3 Console.
2. Create the ELB
Create
the load balancer by executing the command below. Don't forget to change the availability zone and security group accordingly.
$ aws elb create-load-balancer
--load-balancer-name CardStoreLB --listeners
"Protocol=HTTP,LoadBalancerPort=8080,InstanceProtocol=HTTP,InstancePort=8080"
--security-groups sg-8567a2ee --availability-zones eu-central-1a
{
"DNSName": "CardStoreLB-XXXXX.eu-central-1.elb.amazonaws.com"
}
Note the created DNS name to
access the application later. We should change the default health check
settings for ELB to register new instances quickly.
$
aws elb configure-health-check --load-balancer-name CardStoreLB --health-check
Target=HTTP:8080/,Interval=5,UnhealthyThreshold=2,HealthyThreshold=2,Timeout=2
3. Create the Launch Configuration
Create
the launch configuration by executing the command below. The launch
configuration will be used as a template by ASG when creating new instances.
Don't forget to change the S3 bucket name in init script. Also change the
security group parameter accourdingly.
$ aws autoscaling
create-launch-configuration --launch-configuration-name CardStoreLC --key-name
CardStoreKP --image-id ami-af0fc0c0 --instance-type t2.micro --user-data
file://cardstore_ec2_init_script.txt --security-groups sg-8567a2ee --iam-instance-profile S3-Admin-Role
4. Create the ASG to
launch the application and see load balancing works
Create
the auto scaling group by executing the command below. Note the --termination-policies
"OldestInstance" parameter. OldestInstance value is required to be sure
that the instances with the new version of application is not terminated during
scaling in. Don't forget to change the availability zone
accordingly.
$ aws autoscaling
create-auto-scaling-group --auto-scaling-group-name CardStoreASG
--launch-configuration-name CardStoreLC --load-balancer-names CardStoreLB
--min-size 2 --max-size 4 --termination-policies "OldestInstance" --availability-zones eu-central-1a
After creating the the auto scaling group, ASG will
launch two EC2 instances and register them to ELB. It will take some time to
register the instances to ELB. After the instances are registered you can
access the application at ELB DNS address.
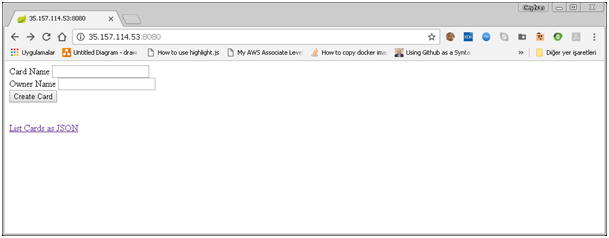
You should see the home page of
the application that shows the app version as V1 and the public ip address of
the instance that process the request. Refresh the browser several times and
you should see that ip address changes at each request. This shows that your
ELB works.

Also you can execute the script
below to see IP address changes. Remember to change ELB address. As you can see from the output requests are distributed to instances.
$ while true; do curl -s
CardStoreLB-XXXX.eu-central-1.elb.amazonaws.com:8080|grep V; curl -s CardStoreLB-XXXX.eu-central-1.elb.amazonaws.com:8080|grep
V; curl -s CardStoreLB-XXXX.eu-central-1.elb.amazonaws.com:8080|grep V; curl -s
CardStoreLB-XXXX.eu-central-1.elb.amazonaws.com:8080|grep V; sleep 3; echo
""; done
##V1
35.158.36.111##
##V1
35.158.25.0##
##V1
35.158.36.111##
##V1
35.158.25.0##
##V1
35.158.36.111##
##V1
35.158.25.0##
##V1
35.158.36.111##
##V1
35.158.25.0##
5. Change the
application
Open the IndexController.java source file using the command
below and change the application version from "V1" to "V2".
$ notepad
src/main/java/com/cardstore/controller/IndexController.java
6. Do zero downtime
update
Now we are ready to build the
applicaton, upload the WAR file to S3 and doing zero downtime upgrade by running
the command below. Don't forget to replace the S3 bucket name in the buildAndUpdateApp.bat file.
$ start buildAndUpdateApp.bat
After the WAR file uploaded to S3 we can watch the progress by
executing a command like below. At start you should see only the V1 in the
output. After a while you should see V2 also, showing that new instances are
launched and registered with ELB. And later you should only see V2, showing
that old instances are terminated. Please replace ELB DNS name with your ELB's
DNS name.
$ while true; do curl -s CardStoreLB-XXXXX.eu-central-1.elb.amazonaws.com:8080|grep
V; curl -s CardStoreLB-XXXXX.eu-central-1.elb.amazonaws.com:8080|grep V; curl
-s CardStoreLB-XXXXX.eu-central-1.elb.amazonaws.com:8080|grep V; curl -s
CardStoreLB-XXXXX.eu-central-1.elb.amazonaws.com:8080|grep V; sleep 3; echo
""; done
##V1
35.158.36.111##
##V1
35.158.25.0##
##V1
35.158.36.111##
##V1
35.158.25.0##
##V1
35.158.36.111##
##V1
35.158.25.0##
##V1
35.158.36.111##
##V1
35.158.25.0##
...
##V1
35.158.36.111##
##V1
35.158.25.0##
##V1
35.158.36.111##
##V2
35.158.36.181##
##V1
35.158.25.0##
##V1
35.158.36.111##
##V2
35.158.36.181##
##V1
35.158.25.0##
##V2
35.158.36.181##
##V1
35.158.25.0##
##V1
35.158.36.111##
##V2
35.158.36.181##
##V1
35.158.25.0##
##V1
35.158.36.111##
##V2
35.158.36.181##
##V2
35.158.35.126##
...
##V2
35.158.36.181##
##V2
35.158.35.126##
##V2
35.158.36.181##
##V2
35.158.35.126##
##V2
35.158.36.181##
##V2
35.158.35.126##
##V2
35.158.36.181##
##V2
35.158.35.126##
The zero downtime update is done
with my awsupdateasg application.
This application is a Java program that use AWS Java SDK.
The output of awsupdateasg should
look like below. Output show the instance id, instance state, instance health
status, ASG state, public ip address and ELB state. At first new instances is
not registered in ELB and their ELB state is shown as null.

A few seconds later, their state should turn to OutOfService
showing that ELB is doing health checks before registering them.

Then their ELB state should turn to InService. At this
point all 4 instances are in use.
And finally awsupdateasg deregisters
old instances. Their state turns to OutOfService. And finally old intances are
terminated as shown below.

Summary
In this post, I have used a Java
program I developed, which uses AWS Java SDK to create a zero downtime update mechanism. You
can access the code here. The program uses AWS EC2, ELB and
ASG APIs.
As I use different AWS services in
the next few weeks, I will try to write a blog about their usages.
As always, please remember to delete
all the resources you have created to avoid any charges.


