In this series of posts, I am writing about various AWS
services. In a previous post,
I have shown how to use Amazon Simple Queue Service and Amazon Simple Email
Service to send an activation mail when a user is registered.
The application I have developed for that post used SQS
to send a message to the activation queue and a queue listener is processed the
messages for sending activation mails to users by using SES.
AWS Lambda is very popular
nowadays. Using the serverless architecture, we can focus only on business
needs and the rest is handled by AWS. But when we start to use a few Lambda
functions together, it starts to get harder and harder to manage the functions and
understand the data flow between them.
AWS Step Functions is very useful in simplifying distributed Lambda
executions. While seeing steps visually when designing the flow provides easy
understanding, having state and ability to retry is very valuble for
distributed execution coordination.
In this post, I will use DynamoDB triggers instead of SQS
for sending an activation mail. When a User item is inserted to DynamoDB User
table, table's trigger executes a Lambda function. Lambda function then generates
a new Step Function execution for generating mail and sending it. The process
is shown in the picture below.

Steps
1. Prepare IAM Roles
2. Implement LF_CardStore_GetUserActivationStatus Lambda Function
3. Implement LF_CardStore_SendUserActivationMail Lambda Function
4. Create the SF_CardStoreSendUserActivationMail Step Function.
5. Create LF_CardStore_UserTableTriggerToSendActivationMail Function for User
Table
Trigger
6. Configure DynamoDB User Table Trigger
7. Change the Application
As a starting point, I will use the code I have developed
for my previous post. The code can be found here.
Application is developed in Java using Spring Boot. For this
post, I will use Node.js to implement Lambda functions easily.
Let's start.
1. Prepare IAM Roles
For our Lambda Functions to call DynamoDB and Simple
Email Service (SES), we create a new IAM Role with AmazonDynamoDBFullAccess, AmazonSESFullAccess
named CardStoreLambdaRole.
For step functions, we create a role named CardStoreStepFunctionsRole. For more
information on creating IAM roles for step functions, see here.
2. Implement LF_CardStore_GetUserActivationStatus Lambda
Function
The code for LF_CardStore_GetUserActivationStatus is
below. DynamoDB client is created in initialization part and user is queried by
username from User table in handler. If user is found, activationStatus field is returned, otherwise an empty string is returned.
In a production usage, we should handle error conditions, for more information
see here.
var aws = require('aws-sdk');

var docClient = new aws.DynamoDB.DocumentClient();

var table = "User";

exports.handler = (event, context, callback) => {
    var username = event.username;
    var activationStatus = "";

    if (!username || username === "") {
        callback(null, activationStatus);
        return;
    }

    var params = {
        TableName: table,
        Key: {
            "username": username
        }
    };

    docClient.get(params, function(err, data) {
        if (err) {
            console.error("Unable to read item. Error JSON:", JSON.stringify(err, null, 2));
            callback(null, activationStatus);
        } else {
            console.log("GetItem succeeded:", JSON.stringify(data, null, 2));

            var user = data.Item;
            activationStatus = user == null ? "" : user.activationStatus;

            callback(null, activationStatus);
        }
    });
};
After putting this Node.js code in zip file, we can
create the Lambda Function with the command below. Replace AWS_ACCOUNT_ID with
your AWS Id.
aws lambda create-function \
--function-name LF_CardStore_GetUserActivationStatus \
--description "Returns activation status of
user" \
--runtime nodejs6.10 \
--handler LF_CardStore_GetUserActivationStatus.handler \
--zip-file fileb://LF_CardStore_GetUserActivationStatus.zip
\
--role arn:aws:iam::AWS_ACCOUNT_ID:role/CardStoreLambdaRole
Once created, we can test the Lambda
function like below. In this sample, activation status of user20 was DONE.
aws lambda invoke \
--function-name LF_CardStore_GetUserActivationStatus \
--payload '{"username":"user20"}' \
out.txt
cat out.txt
"DONE"
3. Implement LF_CardStore_SendUserActivationMail Lambda
Function
The code for LF_CardStore_SendUserActivationMail
is below. In initialization part, we init SES and DynamoDB clients. SES service
is not available in every region, so use a region close to you and configure it
like below.
Handler first tries to find the user. If user found, it
checks the activationStatus of the
user and sends the mail if not already sent. After sending the mail, activationStatus of user is marked as MAIL_SENT.
Please note that the function uses activationUrlBase field of User table to generate final activation url. This is required for Lambda
function to work when Java application is run in both development environment
and on AWS. The Java program generates the base url according to the
environment and saves to the User table.
Also
From field of the mails is specified with FROM_ADDRESS
environment variable.
var aws = require('aws-sdk');

var ses = new aws.SES({
    region: 'eu-west-1'
});

var docClient = new aws.DynamoDB.DocumentClient();

var table = "User";
var fromAddress = process.env.FROM_ADDRESS;

function markActivationStatus(username, activationStatus, callback) {
    var params = {
        TableName: table,
        Key:{
            "username": username
        },
        UpdateExpression: "set activationStatus = :status",
        ExpressionAttributeValues:{
            ":status": activationStatus
        },
        ReturnValues:"UPDATED_NEW"
    };

    console.log("Updating the item...");
    docClient.update(params, function(err, data) {
        if (err) {
            console.error("Unable to update item. Error JSON:", JSON.stringify(err, null, 2));
            callback(null, {"result": "Can't mark activationStatus: " + JSON.stringify(err, null, 2)})
        } else {
            console.log("UpdateItem succeeded:", JSON.stringify(data, null, 2));
            callback(null, {"result": "OK"})
        }
    });
}

function sendEmail(user, activationUrlBase, callback) {

    var activationUrl = activationUrlBase + "?username=" + user.username + "&token=" + user.activationToken;

    var to = user.email;
    var subject = "Activate your Digital Card Store account";
    var mailBody = '<html><body><br/>Dear ' + user.name + '<br/><a href="' + activationUrl
    + '">Please click to activate your user account ' + user.username + "</a><br/>"
    + "</body></html>";

    var eParams = {
        Destination: {
            ToAddresses: [to]
        },
        Message: {
            Body: {
                Html: {
                    Data: mailBody
                }
            },
            Subject: {
                Data: subject
            }
        },
        Source: fromAddress
    };

    console.log('>>> SENDING EMAIL');
    var email = ses.sendEmail(eParams, function(err, data){
        if (err) {
            console.log(err);
            callback(null, {"result": "Can't send email:" + err});
        }
        else {
            console.log(">>> EMAIL SENT");
            markActivationStatus(user.username, "MAIL_SENT", callback);
        }
    });
}

function findUser(username, callback) {
    var params = {
        TableName: table,
        Key:{
            "username": username
        }
    };

    docClient.get(params, function(err, data) {
        if (err) {
            console.error("Unable to read item. Error JSON:", JSON.stringify(err, null, 2));
            callback(null, {"result": "Unable to read item. Error JSON:" + JSON.stringify(err, null, 2)});
        } else {
            console.log("GetItem succeeded:", JSON.stringify(data, null, 2));

            var user = data.Item;
            var activationStatus = user == null ? "" : user.activationStatus;
            var activationUrlBase = user == null ? "" : user.activationUrlBase;

            if (activationStatus === "NONE")
                sendEmail(data.Item, activationUrlBase, callback);
            else
                callback(null, {"result": "Activation status of user " + username + " is not appropriate. It is " + activationStatus});
        }
    });
}

exports.handler = (event, context, callback) => {
    console.log("Incoming: ", event);

    var username = event.username;

    findUser(username, callback);
};
After putting this Node.js code in zip file, we can
create the Lambda Function with the command below. Replace AWS_ACCOUNT_ID with
your AWS Id and specify mail sender address with FROM_ADDRESS environment
variable.
aws lambda create-function \
--role
arn:aws:iam::520334389080:role/CardStoreLambdaRole \
--function-name
LF_CardStore_SendUserActivationMail \
--description "Send activation mail
to the user" \
--runtime nodejs6.10 \
--handler
LF_CardStore_SendUserActivationMail.handler \
--zip-file
fileb://LF_CardStore_SendUserActivationMail.zip \
--role arn:aws:iam::AWS_ACCOUNT_ID:role/CardStoreLambdaRole
\
--environment Variables={FROM_ADDRESS=sender@app.com}
\
Once created, we can test the Lambda function like below.
In this sample, because the activation status of user20 was DONE, mail is not
sent.
aws lambda invoke \
--function-name LF_CardStore_SendUserActivationMail \
--payload '{"username":"user22"}' \
out.txt
cat out.txt
{"result":"Activation status of user
user22 is not appropriate. It is DONE"}
When we test with another user, mail
is sent.
aws lambda invoke \
--function-name LF_CardStore_SendUserActivationMail \
--payload '{"username":"user23"}' \
out.txt
cat out.txt
{"result":"OK"}
We can see the Lambda functions in
AWS Console like the picture below.

4. Create the SF_CardStoreSendUserActivationMail Step
Function.
Now, we are ready to create the step function that use the
Lambda functions created. The Amazon JSON language for defining the step
function is below. Replace AWS_ACCOUNT_ID with your AWS Id.
{
  "Comment": "Step function to send user activation mail",
  "StartAt": "GetActivationStatus",
  "States": {
    "GetActivationStatus": {
      "Type": "Task",
      "Resource": "arn:aws:lambda:eu-central-1:AWS_ACCOUNT_ID:function:LF_CardStore_GetUserActivationStatus",
      "Next": "CheckActivationStatus",
      "ResultPath": "$.activationStatus"
    },
    "CheckActivationStatus": {
      "Type" : "Choice",
      "Choices": [
        {
          "Variable": "$.activationStatus",
          "StringEquals": "NONE",
          "Next": "SendActivationMail"
        }
      ],
      "Default": "MailSent"
    },
    "SendActivationMail": {
      "Type" : "Task",
      "Resource": "arn:aws:lambda:eu-central-1:AWS_ACCOUNT_ID:function:LF_CardStore_SendUserActivationMail",
      "Next": "MailSent"
    },
    "MailSent": {
      "Type": "Pass",
      "End": true
    }
  }
}
After saving this code to SF_CardStore_SendUserActivationMail.js
file, we can create the step function with the command below. Replace AWS_ACCOUNT_ID
with your AWS Id.
aws stepfunctions create-state-machine \
--name SF_CardStore_SendUserActivationMail \
--role-arn arn:aws:iam::AWS_ACCOUNT_ID:role/ CardStoreStepFunctionsRole \
--definition "$(cat
SF_CardStore_SendUserActivationMail.js)"
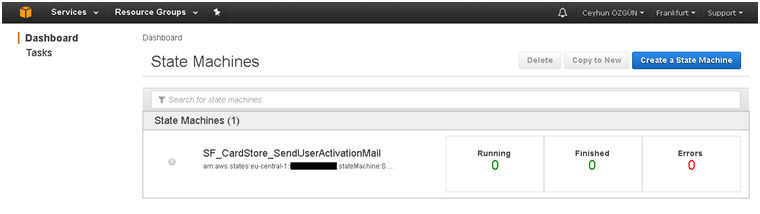
We can see the step function in the
console like below.
Steps for the step function can be
seen like the picture below.

The flow is explained below.
1. Step function starts at GetActivationStatus task. This
task is implemented by calling LF_CardStore_GetUserActivationStatus
Lambda function. username parameter is expected to be
exist in the parameter given when starting the step function execution. Input
parameter is passed to the function as is. Result of the function is put to the
step machine data with the name activationStatus by
"ResultPath":
"$.activationStatus"
expression. The result will be checked in next step by
using this field name. For more information on input and output management for
steps, see here.
The next step is specified with "Next": "CheckActivationStatus" expression.
2. Next step is CheckActivationStatus. The type of this
step is Choice. In this step result of the LF_CardStore_GetUserActivationStatus
Lambda function is checked. If the activation status of
the user is "NONE", SendActivationMail step is executed. Otherwise, MailSent step is executed, which means the end of the step
function and mail is not sent.
3. SendActivationMail step is executed conditionally. This
step calls LF_CardStore_SendUserActivationMail. Input parameter username is passed as is. The next step
is MailSent, which
means the end of the step function.
4. MailSent step is marked as the end of the step function.
We can start a new execution with the command below.
Replace AWS_ACCOUNT_ID with your AWS Id.
aws stepfunctions start-execution \
--state-machine-arn arn:aws:states:eu-central-1:AWS_ACCOUNT_ID:stateMachine:SF_CardStore_SendUserActivationMail
\
--input '{"username":"user22"}'
We can see the
flow of the execution by clicking the execution in the console. We can see the
executed steps with the green color. In this case, SendActivationMail step is
not executed and mail is not sent.

We try
another user and this time mail is sent by executing SendActivationMail step like
below.

Now our step function is ready for
sending activation mails.
5. Create
LF_CardStore_UserTableTriggerToSendActivationMail Function for User Table
Trigger
The code for the trigger is below. When a record is
inserted, deleted or updated our handler will be called. Handler may be called
for more than one record, so we loop over event.Records.
event.Records[i].dynamodb.NewImage will contain the record inserted. For more
information, see here.
We want to send activation mails only when a new record
is inserted. Thus we check whether the value of event.Records[i].eventName is
"INSERT".
After user name is extracted, we start a new execution by
using AWS.StepFunctions API. Step function ARN is retrieved from environment
variable. We pass the username of the record as username parameter to the step
function.
const AWS = require('aws-sdk');

var stepFunctionArn = process.env.STEP_FUNCTION_ARN;

function startSendUserActivationMailStepFunctionExecution(username, callback) {
  console.log("Starting SendUserActivationMail StepFunction Execution for user " + username);

  const stepfunctions = new AWS.StepFunctions();
  const params = {
    stateMachineArn: stepFunctionArn,
    input: JSON.stringify({ "username": username })
  };

  // start a state machine
  stepfunctions.startExecution(params, (err, data) => {
    if (err) {
      callback(err, null);
      return;
    }

    console.log(data);

    callback(null, 'Started SendUserActivationMail StepFunction Execution for user ' + username);
  });
}


exports.handler = (event, context, callback) => {
    console.log('Received event:', JSON.stringify(event, null, 2));
    event.Records.forEach((record) => {
        console.log(record.eventName);
        console.log('DynamoDB Record: %j', record.dynamodb);

        if (record.eventName === "INSERT") {
            var username = record.dynamodb.NewImage.username;

            if (username)
                startSendUserActivationMailStepFunctionExecution(username.S, callback);
        }
    });
};
After saving the code to file and zip the file, we can
create the Lambda function with the command below. Replace AWS_ACCOUNT_ID with
your AWS Id.
$ aws lambda create-function \
--function-name
LF_CardStore_UserTableTriggerToSendActivationMail \
--description "User Table trigger for starting
SF_CardStore_SendUserActivationMail execution" \
--runtime nodejs6.10 \
--handler LF_CardStore_UserTableTriggerToSendActivationMail.handler
\
--zip-file
fileb://LF_CardStore_UserTableTriggerToSendActivationMail.zip \
--role
arn:aws:iam::AWS_ACCOUNT_ID:role/CardStoreLambdaRole \
--environment
Variables={STEP_FUNCTION_ARN=arn:aws:states:eu-central-1:AWS_ACCOUNT_ID:stateMachine:SF_CardStore_SendUserActivationMail}
Now we are ready to attach this
trigger to the User table.
6. Configure DynamoDB User Table Trigger
To attach a trigger to User table, first we should enable
DynamoDB streams on the table. This way when the table is modified by any
insert, update or delete action, a new record is added to the stream. We can
attach a Lambda trigger to this stream. For more information, see here.
Go to DynamoDB console and select User table. Click
Manage Stream and select New image for View type and click Enable as shown in
the picture below.

Next, in the
Triggers tab, click Create trigger button. Select Existing Lambda Function from
menu. Select LF_CardStore_UserTableTriggerToSendActivationMail from Function
combo, enter 1 as Batch size and check Enable trigger checkbox, then click
Create to create trigger.

Now, User table trigger is
configured.
7. Change the Application
For the whole mechanism to work, we should change our Java application to add activationBaseUrl field to User table record when
creating a user.
Also we remove the SQS and SES dependencies from the
application because activation mail will be sent by the Lambda function.
Final code can be found at my GitHub repository.
After running the application, the activation mail will
be sent by the step function triggered by DynamoDB when a new user is
registered.
Summary
In this post, I have shown how to create a serverless
user activation mechanism by using AWS services. The mechanism is triggered by
DynamoDB trigger and is implemented using step functions. Lambda functions is
used for getting activation status and sending mail. The code can be found in
my GitHub repository.
I will continue to use various AWS services and blogging
about them.
I wish to show thanks to you just for bailing me out of this particular trouble.As a result of checking through the net and meeting techniques that were not productive, I thought my life was done.
ReplyDeleteAWS Training in Bangalore|
Appreciation for really being thoughtful and also for deciding on certain marvelous guides most people really want to be aware of.
ReplyDeleteBest aws training Institute in chennai
Really super blog, keep it up! and updates with more thing on AWS. Learn AWS at AWS Online Course Get more knowledge
ReplyDeleteAWS Training in Bangalore
ReplyDeleteBest Big Data and Hadoop Training in Bangalore
Mastering Machine Learning
Artificial intelligence training in Bangalore
Blockchain training in bangalore
Python Training in Bangalore
Very useful information provided by you, keep share and update AWS Online Training
ReplyDeleteThanks for splitting your comprehension with us. It’s really useful to me & I hope it helps the people who in need of this vital information.
ReplyDeleteGerman Classes in Chennai
Java Training in Chennai
german teaching institutes in chennai
German Training Institutes in Chennai
Java Training center in Chennai
Java Certification course in Chennai
Very informative blog! I liked it and was very helpful for me. Thanks for sharing. Do share more ideas regularly.
ReplyDeleteFrench Language Classes in Mulund
French Training near me
French Coaching Classes in Mulund
French Classes in Mulund West
German Training Institute in Mulund
German Course in Mulund East
Best German Coaching Center in Mulund
I am really enjoying reading your well written articles.
ReplyDeleteIt looks like you spend a lot of effort and time on your blog.
I have bookmarked it and I am looking forward to reading new articles. Keep up the good work..
Hadoop Training in Chennai
Big Data Training in Chennai
Big Data Course in Chennai
hadoop training in bangalore
big data training in bangalore
Excellent post! keep sharing such a post
ReplyDeletenationalreviewcouncil
Education
Amazing work. Extra-ordinary way of capturing the details. Thanks for sharing. Waiting for your future updates.
ReplyDeleteSpoken English Classes in Chennai
Best Spoken English Classes in Chennai
Spoken English Class in Chennai
Spoken English in Chennai
Node JS Training in Chennai
Node JS Course in Chennai
Node JS Advanced Training
Node JS Training Institute in chennai
I gathered lots of information from your blog and it helped me a lot. Keep posting more.
ReplyDeleteAWS Training in Chennai
AWS course in Chennai
DevOps certification in Chennai
DevOps Training in Chennai
Data Science Course in Chennai
Data Science Training in Chennai
AWS Training in Velachery
AWS Training in Tambaram
Thanks for sharing this useful info.. cloud computing
ReplyDeleteInformative blog! it was very useful for me.Thanks for sharing. Do share more ideas regularly.
ReplyDeleteEnglish Speaking Classes in Mumbai
English Speaking Course in Mumbai
Best English Speaking Classes in Mumbai
Spoken English Classes in Mumbai
English Classes in Mumbai
You are an amazing writer. No words to describe your blog. Way to go.
ReplyDeleteXamarin Training in Chennai
Xamarin Course in Chennai
Xamarin Training
Xamarin Course
Xamarin Training Course
Xamarin Training in Adyar
Xamarin Training in Velachery
Xamarin Training in Tambaram
Extra-ordinary Post. Amazing way of handling things. It shows your great understanding of the subject. Thanks for Sharing.
ReplyDeleteInformatica Training in Chennai
Informatica Training Center Chennai
Informatica course in Chennai
Informatica Training center in Chennai
Informatica Training chennai
Informatica Training institutes in Chennai
Informatica Training in OMR
Informatica Training in Porur
Informatica Training in Tambaram
Thanks. It's really helped me. Thanks Again
ReplyDeleteWeb Development Company
Nice blog,Very useful article,Thanks for sharing this information.
ReplyDeleteDevOps Training
DevOps Online Training
Thank You, Also Check Our Recent Post On Free Forex Signals
ReplyDeletenice post.
ReplyDeleteaws online training
r programming online training
HI thanku so much this infromation this is greatful blog
ReplyDeletecs executive
freecseetvideolectures/
Download GATE IO Mt4: A Complete Solution For Your Forex Trading.
ReplyDeleteBig Data training in Chennai is nowadays not easy for many students. They don’t know how to start this?? Here, is the secured and Certified placewhich is INFYCLE who were all offering good courses with training and with top salary package placement. HURRY UP!!!
ReplyDeleteDo you believe in long term investement . One of the option of doing investement is by investing in Crypto currencies. You can invest in Fudxcoin company that deals in the selling and purchasing of Crypto Currency. It is a reliable company. One need not doubt in investing in it as i have also bought crypto currency from it and feeling very satisfied with their services.
ReplyDeletecrypto currency block chain technology
ReplyDeleteVery interesting post and I want more updates from your blog. Thanks for your great efforts.
Virginia Online Divorce
How to get a Divorce in VA
서울콜걸
ReplyDelete울산콜걸
대구콜걸
대전콜걸
인천콜걸
세종콜걸
부산콜걸
인천콜걸
울산콜걸
대구콜걸
Great post thanks for sharing this post
ReplyDeleteSai Satcharitra Pdf
Useful blog
ReplyDeletegold price in chennai
today gold rate namakkal
You expressed this beautifully. Thank you for shedding light on a topic that’s often overlooked. please check this out Devops course near me
ReplyDeleteYou expressed this beautifully. Thank you for shedding light on a topic that’s often overlooked. please check this outBusiness Intelligence Services in Dubai
ReplyDeleteYou expressed this beautifully. Thank you for shedding light on a topic that’s often overlooked. please check this out.Android App UI/UX Design Experts in Dubai
ReplyDeleteThanks man. Definitely given me a more understanding of how this can be possible, as long as we put in the effort. Artificial Intelligence Course in coimbatore
ReplyDeleteDiscover the perfect balance of comfort and modern design Belmont Wears delivers essentials with premium attention to detail confidence begins with what you wear.
ReplyDeleteTurn heads instantly with the Apex Legends Ignite Bomber Jacket from Arsenal Jackets a striking blend of bold design and gaming-inspired flair. Featuring a unique concept that adds an edgy, futuristic touch, this jacket is built to stand out in any crowd. Its vibrant detailing and sleek bomber silhouette create a perfect balance between street style and statement fashion, while the premium craftsmanship ensures all-day comfort. If you’re looking for something truly different and eye-catching, this jacket delivers a powerful, unforgettable look.
ReplyDeleteVery informative Site. Everything is explained in a simple and practical way.
ReplyDeleteIt’s really useful for people who are unsure where to begin cost of studying in UK for Indian students 2026
This tutorial is pure gold for beginners wanting to build voice-enabled apps! The way you explained creating intents, slots, and testing the bot makes it feel achievable. For learners who want to go deeper into backend development, doing a structured program helps a lot. I highly recommend spring boot project training in Electronic City Bangalore where you build real-world applications – exactly the kind of hands-on experience that complements tutorials like yours. After that, coming back to this Lex guide will make even more sense. Thanks for keeping this archived post alive!
ReplyDeleteAmazing details shared here about the Advance AI Course in Coimbatore.
ReplyDeleteHelpful guidance for students planning to build their future through thetop 10 artificial intelligence colleges in Coimbatore fees.
ReplyDeleteI think the admin of this site is in fact working hard in favor of his web page, for the reason that here every information is quality based stuff AI / ML training institute
ReplyDeleteYour amazing insightful information entails much to me and especially to my peers. Thanks a ton; from all of us. AI / ML training institute
ReplyDeleteThanks for the excellent post. It is very useful and more informative by both technically and manually. high demand courses in Canada for PR
ReplyDeleteGreat explanation. The platform is simple and very practical to use. It helps users move forward with confidence. universities without IELTS in Germany
ReplyDeleteWell explained post. The platform helps in understanding the process from a practical angle.
ReplyDeleteIt gives users more confidence in their choices universities without IELTS in Germany.
What a helpful resource! I appreciate how the content focuses on practical information rather than unnecessary details. It made the whole topic much easier to understand living expenses in UK for students per city
ReplyDelete
ReplyDeleteReally informative! The platform makes the process simple and clear. The smart system helps users avoid confusion and save time. free education countries for indian students
ReplyDeleteNicely presented content. The platform brings consistency and clarity to the entire process.
It ensures users stay focused and make progress step by step universities in Germany.
Loved reading this. The platform makes the journey easier for everyone. It provides useful suggestions that save time free education countries for indian students
ReplyDeletethank you for sharing it is very useful me. high demand courses in Canada for PR
ReplyDeleteThis blog post offers great value to readers who want to learn more about the topic. I appreciate the depth of information and the practical tips included. The content is well-written and easy to understand. Thank you for sharing your knowledge and helping readers expand their understanding. top 10 university in world.
ReplyDeleteI really enjoyed reading this article from start to finish. The content is informative, engaging, and highly relevant. Your ability to explain complex ideas in a simple manner is impressive. Thank you for creating such high-quality content and making it available to readers seeking useful information. top 10 university in world.
ReplyDeleteReally enjoyed this breakdown of the serverless user activation mechanism with Amazon. The step-by-step explanation made a complex workflow much easier to understand, especially for anyone building scalable cloud applications. I also appreciate finding useful resources online, including Cheap Felon Housing, that help people access valuable support and information.
ReplyDelete